Creating a Visual Effects Overlay for OBS

What if your scene takes place in the rain? Snow? What if your scene needs a more elaborate setting than budget allows? This is where the magic of visual effects (VFX) comes in.
One new thing we are seeing, partially as a result of the pandemic, is how to stream live shows. In an effort to inspire more creativity and bring a good show, I am working on various VFX to incorporate in live shows I stream. My first effect is snow, and I had to create it to work as simply as possible over OBS (Open Broadcaster Software – a free tool to help stream shows and content to various outlets, like YouTube). In other words, the goal is to create visual overlay effects. How was this done? It required some thought to both filming it and post production, as well as some plain old luck.
Filming
There are programs like Adobe After Effects, and Premiere Pro, that have built in effects – but the problem with those is that they are set up to use for something already filmed. They are meant for post production when we need a transparent overlay. Sure, there are pre-existing visual effects, but there are possible copyright issues with using them. So I thought it best to create my own so that I can use it however I need.
The first issue was how to even film snow. I have been working on filming rain with little success. I was trying to artificially create “rain” in controlled conditions. The issues here are plenty – how to get the right lighting to get the rain to stand out not just in general, but against a green screen (A green screen is necessary – it is the easiest way to remove the background in post production). However, the biggest issue was not those things, it was how to get the rain to look realistic. I tried a hose, a shower, a watering can – nothing worked, as it all still looked artificial. I finally wondered if it was best to have “uncontrolled” conditions. In other words, film rain when it actually rained.
Turns out, it snowed in my area before it rained – we got snow in November, which is earlier for us than normal. I seized this opportunity to try filming.
I taped a green screen to the house wall. I tried lighting, but I do not have any light that can compete with natural daylight, not even with overcast skies, so I had to scrap those. I was lucky that the effect still worked with just natural overcast lighting.

I filmed in High Def (1920 by 1080) to allow for as much editing as possible without sacrificing quality. A lens hood is also necessary to keep snow from falling on the lens. The film was a little over a minute to make sure there was enough that would look natural, and would loop effectively.
Was it cold? Yes! But I like to think I did it in the name of art. :) Now, for what to do in post to complete the effect.
Post Production
The effect needs to have a transparent background so that any tech can easily upload it to OBS and easily apply it over the video stream. So, having the right program to do this is essential. I went with Adobe After Effects since it is a program specifically for digital effects.
So, first, to get rid of the green screen – this needs a chroma key tool. After Effects has an effect called Keylight that does this. Applying this and selecting the green screen color does the trick. Then, it is just a matter of adjusting and tweaking it. I increased the contrast and brightness for example. Furthermore, silence the audio here before exporting so there will just be the visual.


The next issue is how to actually make the background transparent. This is done through the options in exporting. When exporting, choose the QuickTime (MOV) export option. In the video output settings, choose “RGB + Alpha.” It is the Alpha channel that actually makes the background (anything black) transparent. At this point, it is exported as an overlay.

One more note – to really make it easy for anyone to use, the file size should be manageable. I reduced the quality to a quarter HD (540 by 960). That way, it would be easy for any streaming tech to download and use. It does decrease the quality, but in live streaming, I made the choice to make it accessible to others I work with.
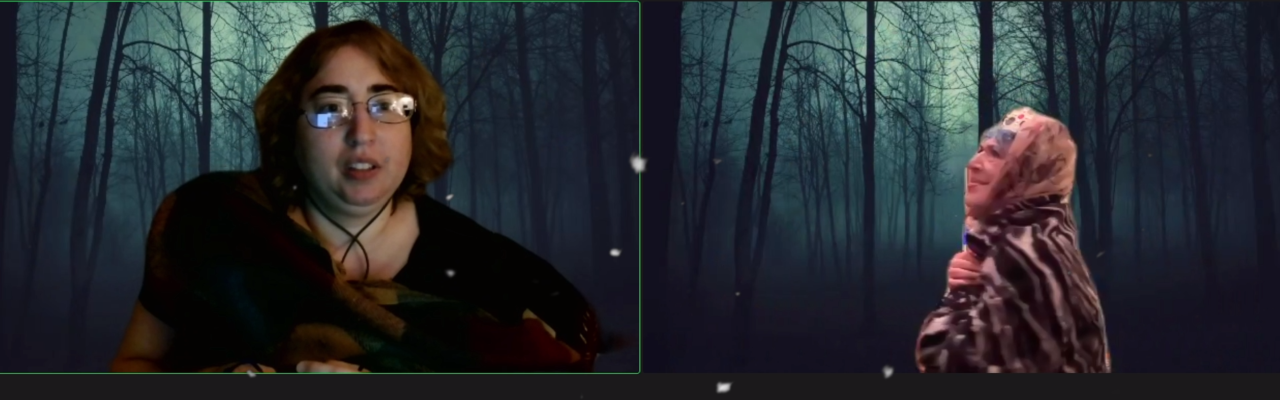
So there it is! Hopefully this gives an idea of the process, and to help create better live, streamed shows. By doing this, we can create effects not just for the audience, but how to interact with each other – how to get the actors on, say Zoom, to interact with each other in new and unique ways. My hope is that others can come up with other types of effects based on this. Ultimately, this is a means to an end – how to use technology to tell stories in a more engaging way.